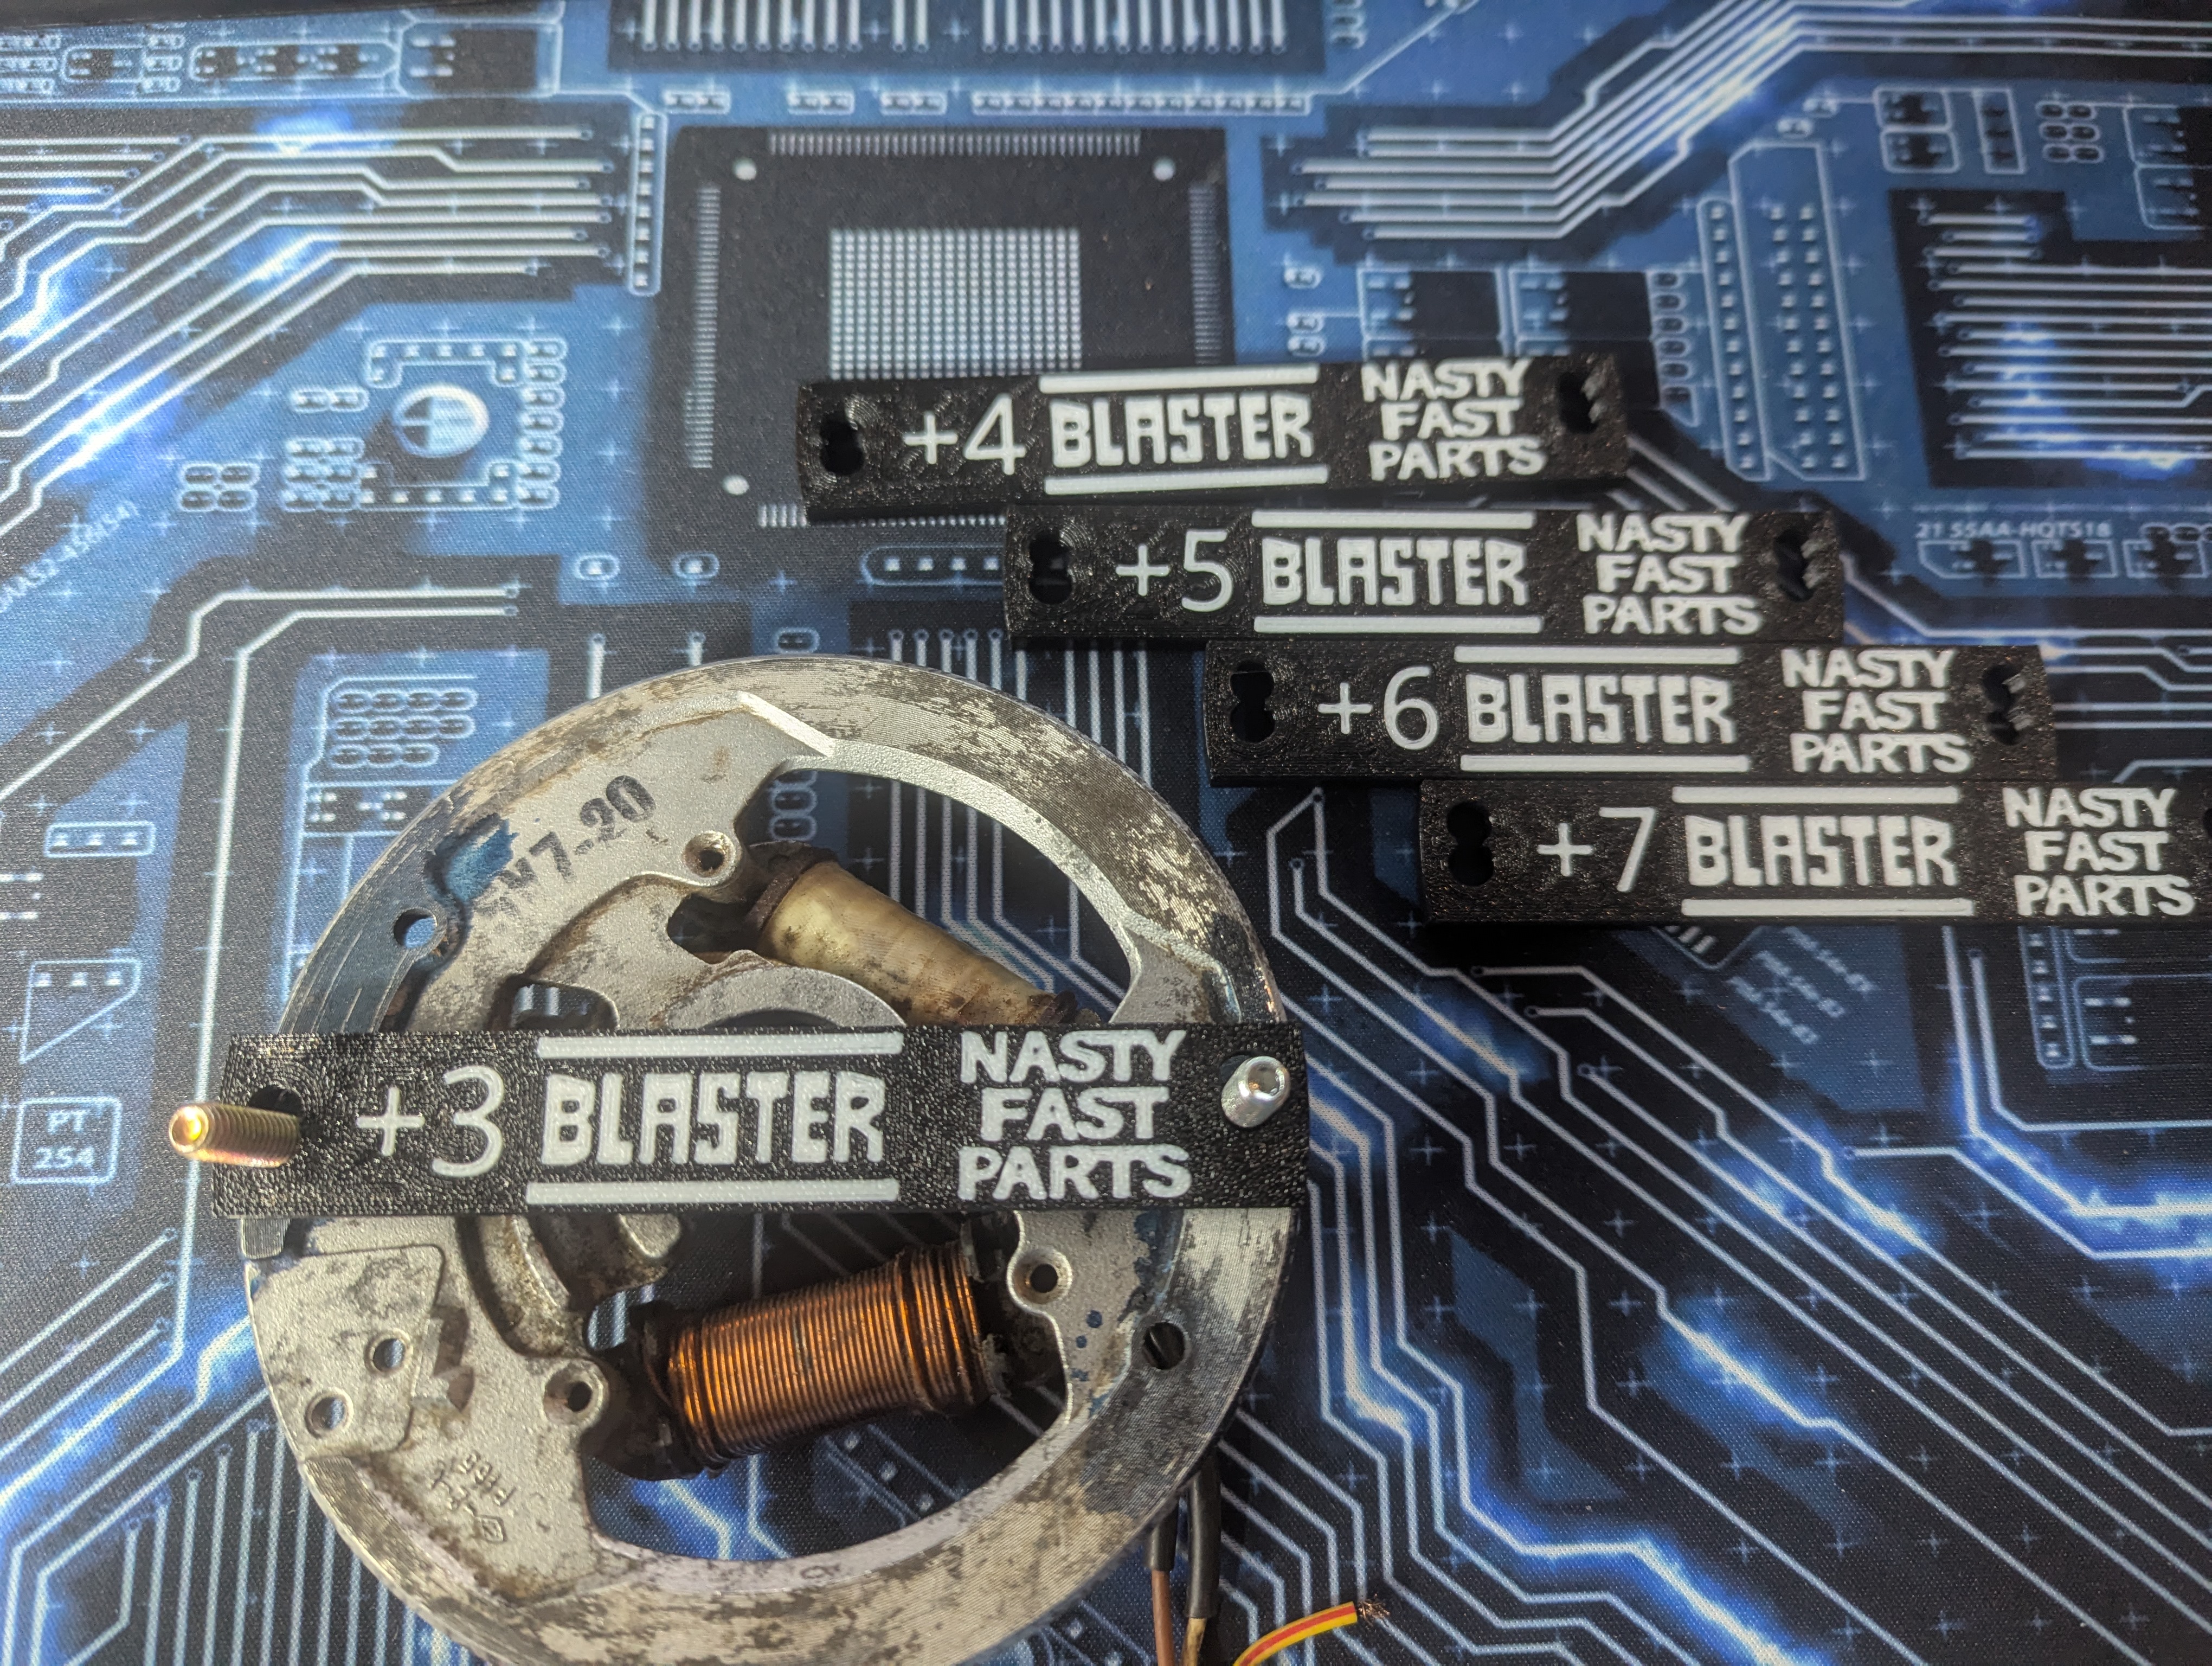
Yamaha Blaster • Free STL

Blaster +3 Stator Jig

A printable +3 degree stator jig for marking the stator plate before grinding the adjustment slots.

Use the existing stator jig instructions for the full setup reference.

How To Use It

  1. Hold the jig against the bottom of the flywheel.
  2. Use two M6 bolts to align it.
  3. Mark the stator plate where the jig shows the +3 position.
  4. Grind the stator plate slots to the marked position.
  5. Reinstall and verify timing before final use.
This page links back to the Blaster stator jig instruction PDF so the printable file and usage guide stay together.

Product Photos

Blaster stator jig reference photos.

Blaster stator jig set
Blaster stator jig set.
Blaster stator jig close-up
Blaster stator jig close-up.